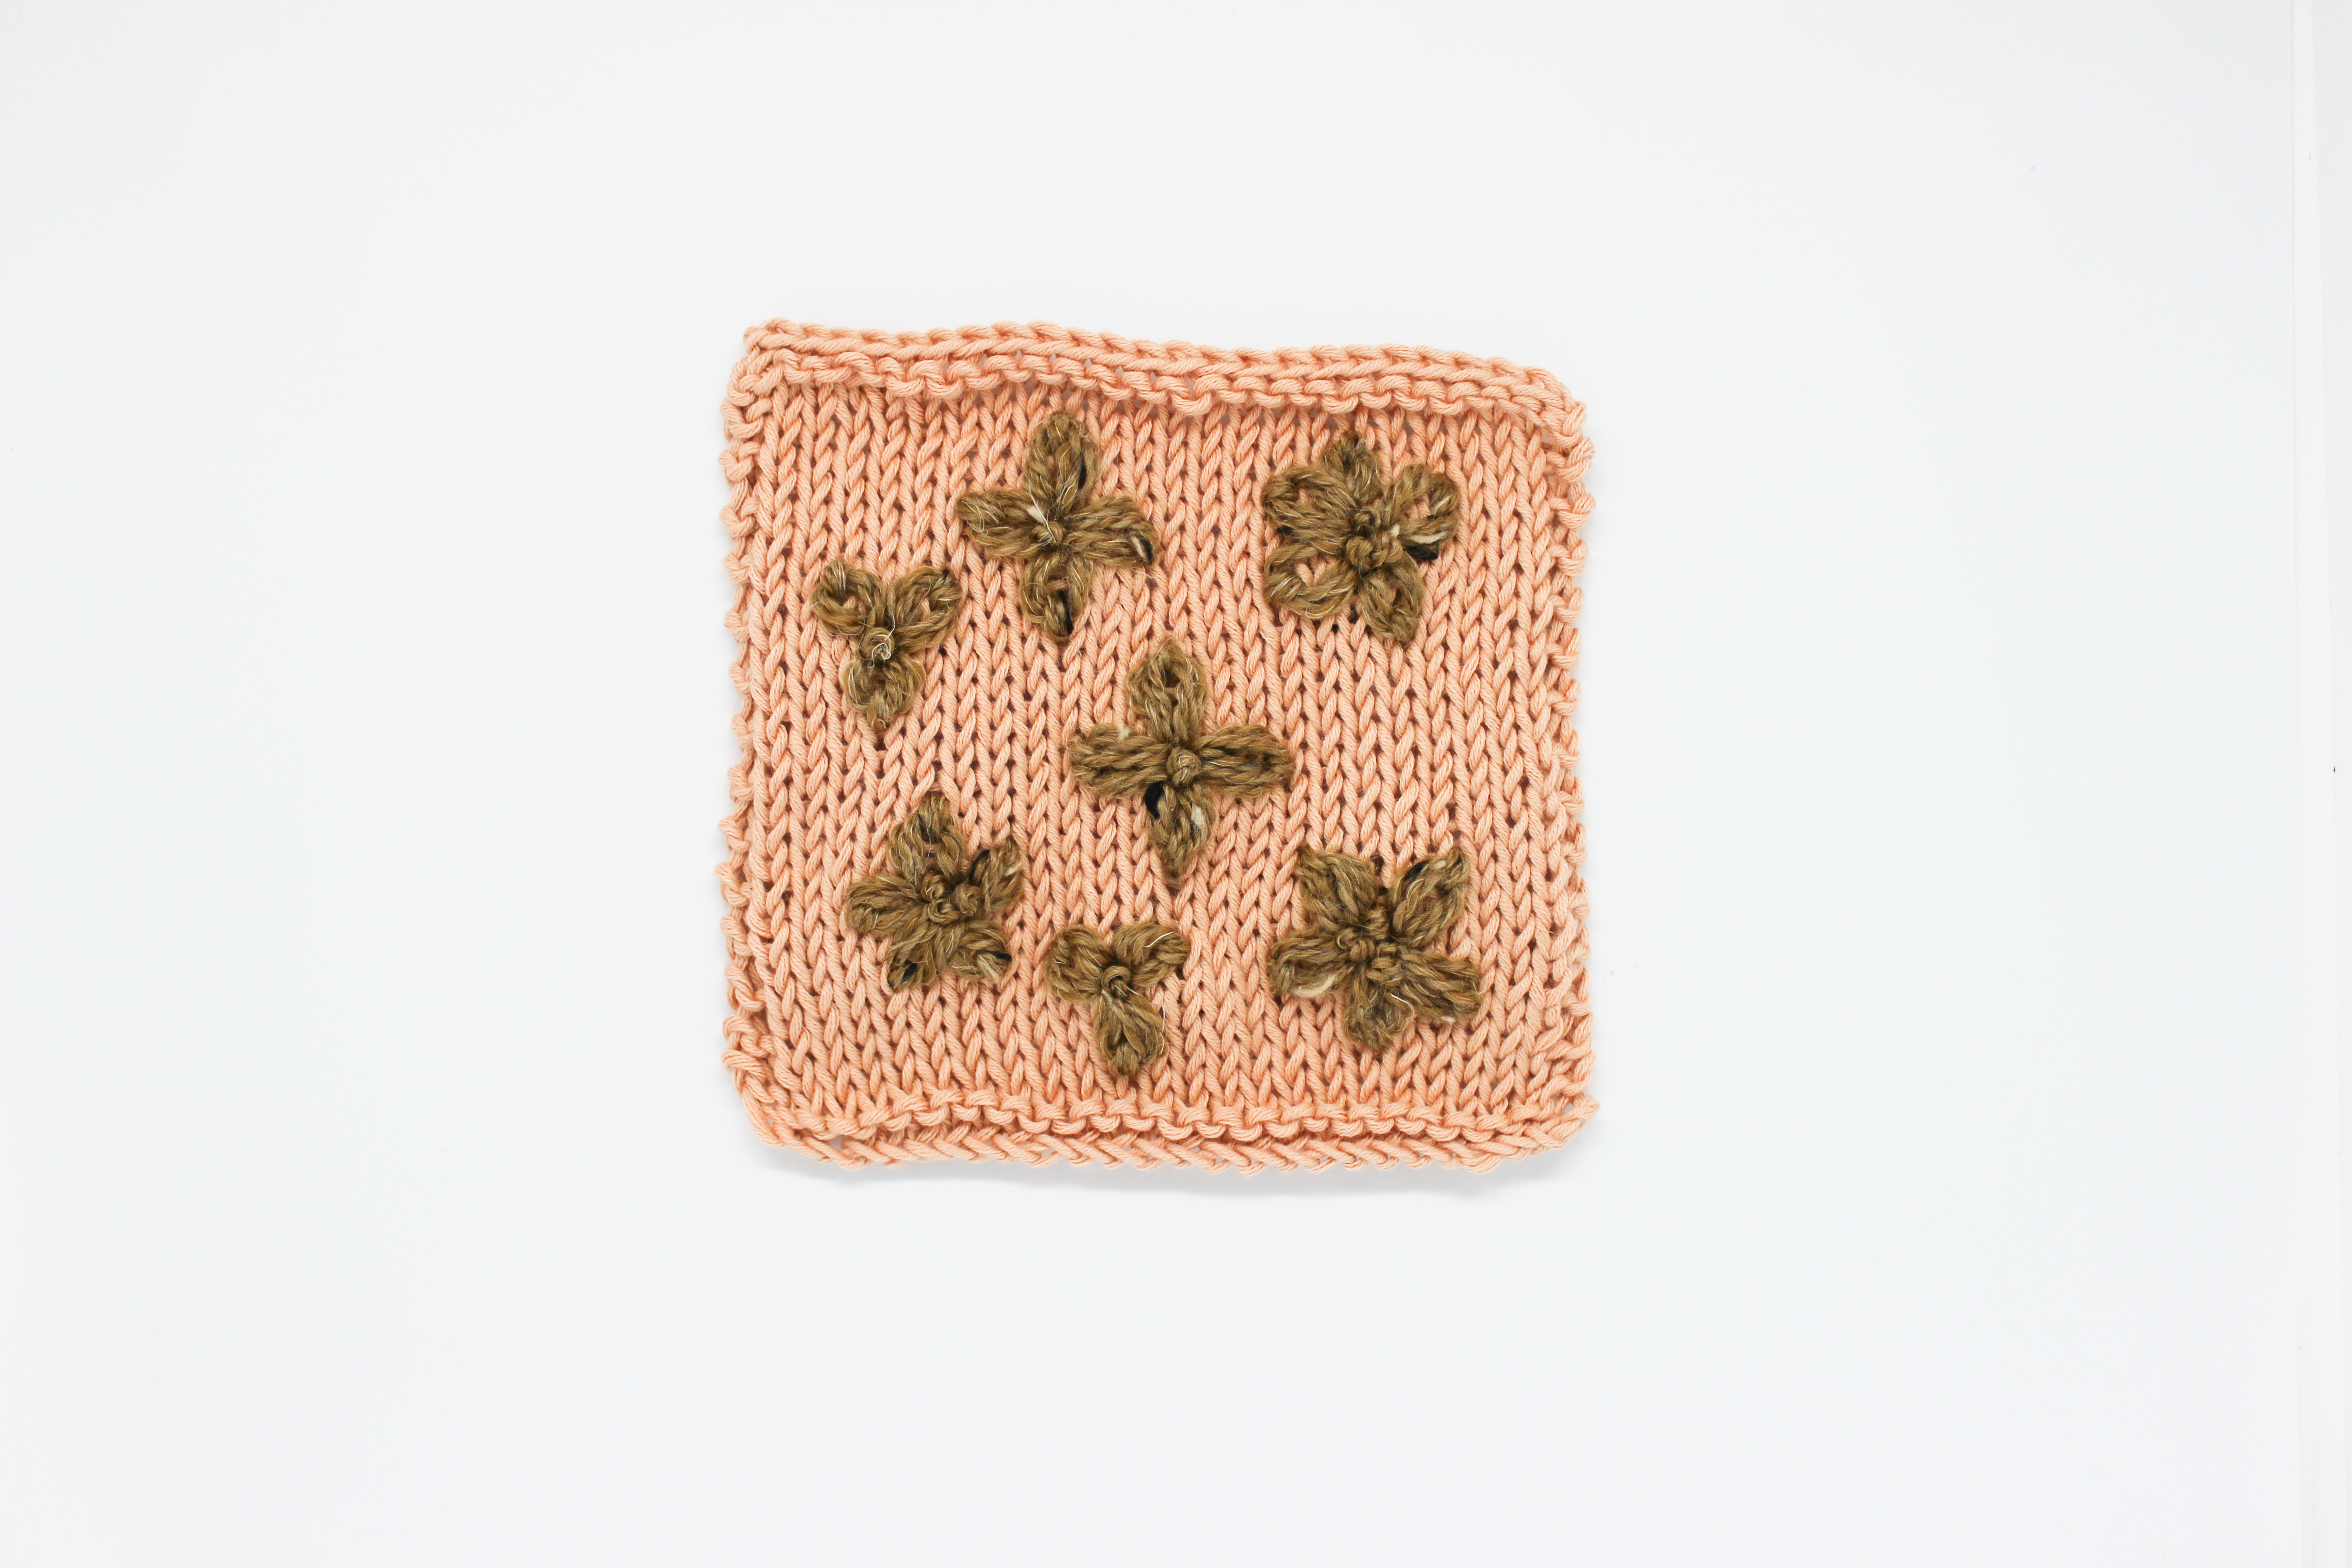
Raise your hand if you’ve ever finished a garment only to think, “It came out a little plain”. Sometimes we fall in love with basic patterns, but when finished don’t look as cool as we thought they would. Today we bring you a tutorial to add the finishing touch to these garments so they become your favorites. How will we do it? By adding embroidery on top of your knitting.
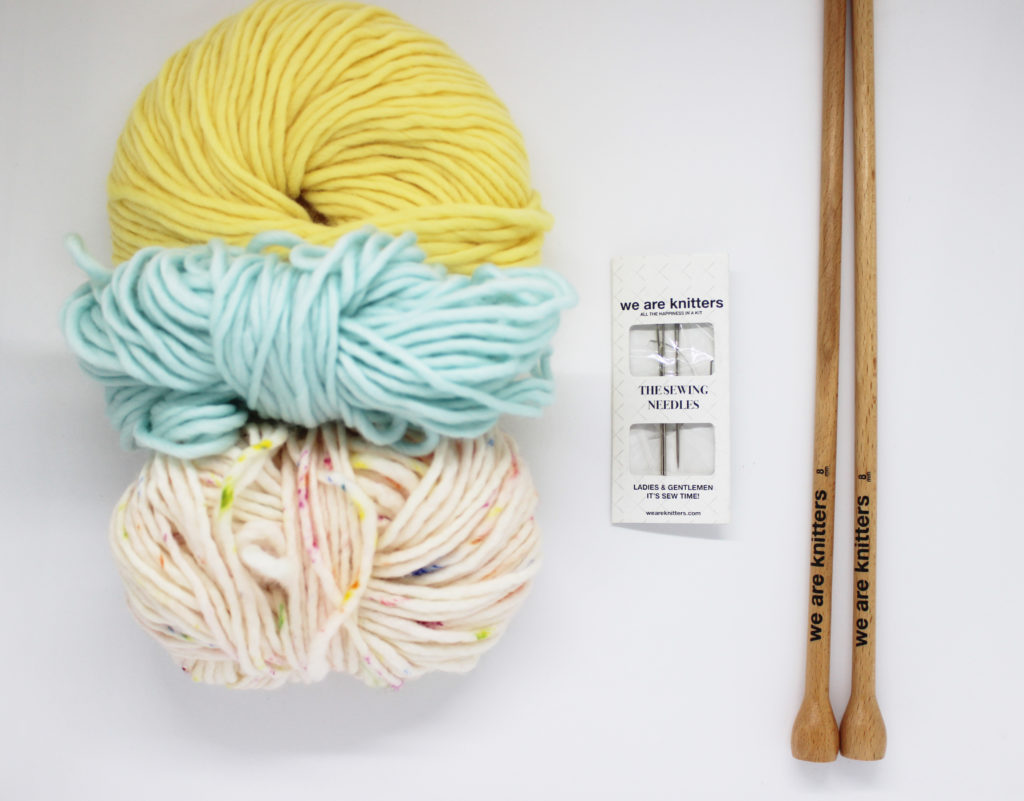
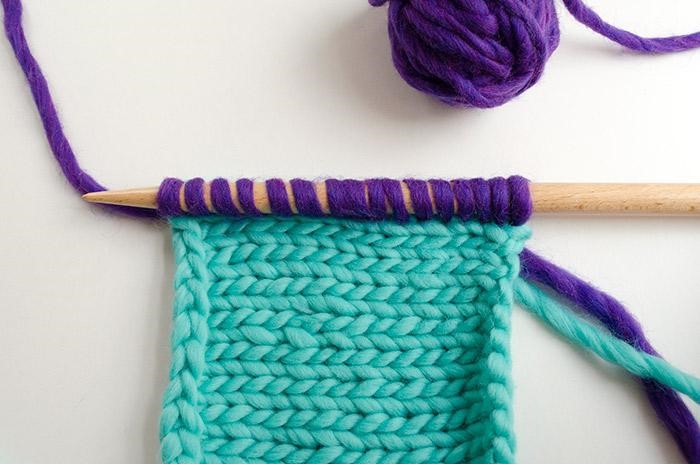
For this tutorial we used some skeins of our Petit Wool, size 11 wooden needles, and a tapestry needle for embroidering. If you decide to embroider some of your projects remember to check your bags of left over yarn, you’re sure to find some treasured yarn you can use, because you won’t need a lot.
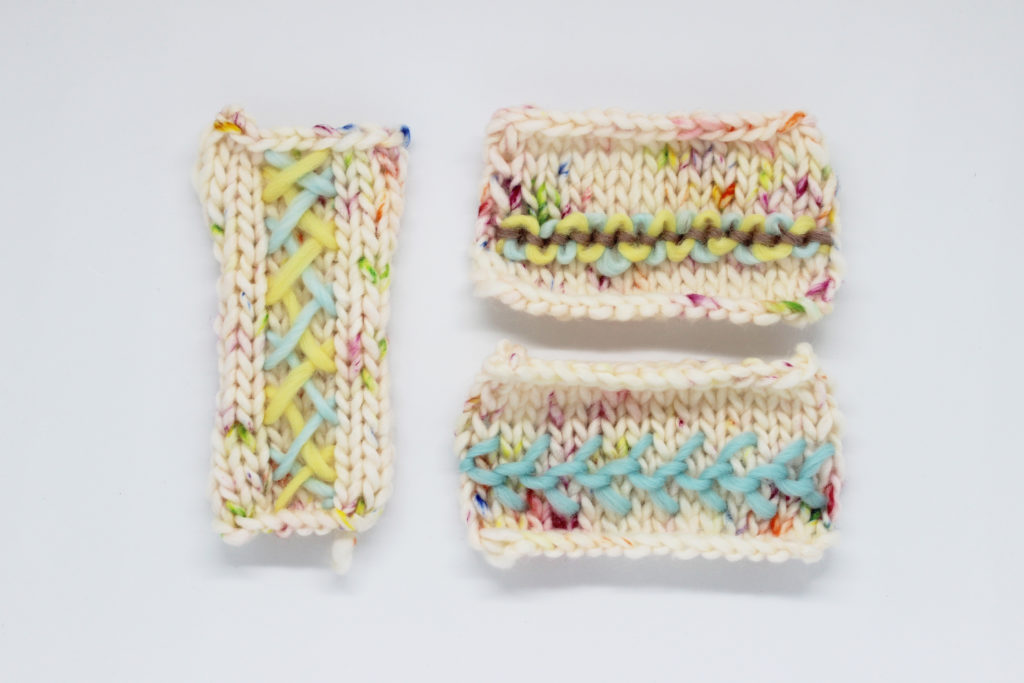
Stitch 1: crossed stitches
To make this stitch you will need two different colors of yarn. This stitch runs vertically, so it would look great on cardigan plackets or on the front of a sweater you want to add a special touch to.
In our sample we made it 3 stitches wide, but if you want to make it wider you can increase the distance.
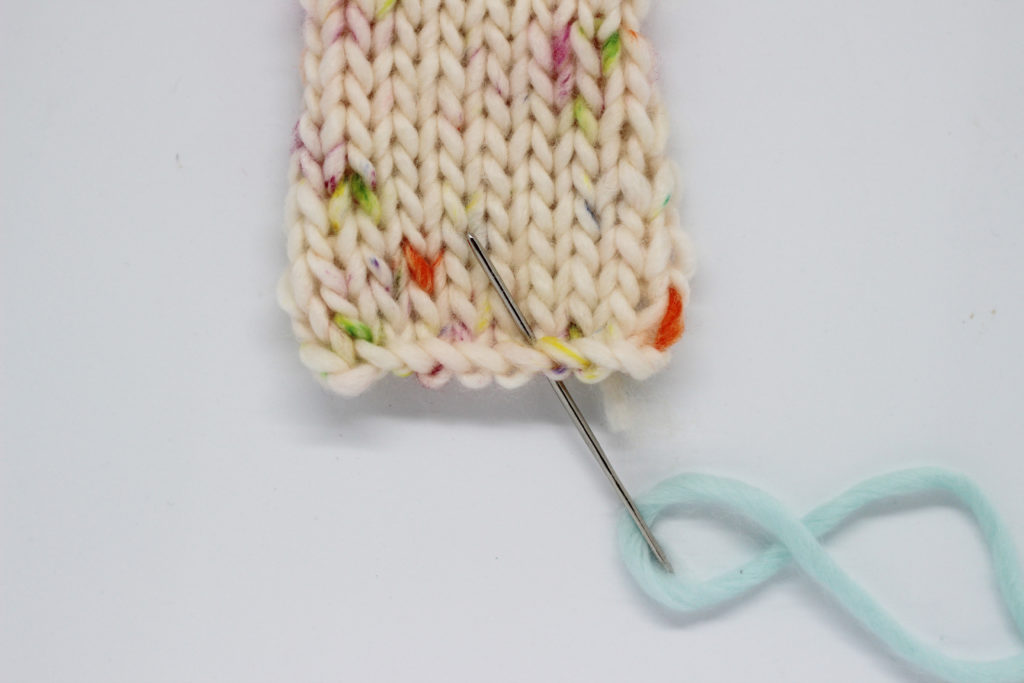
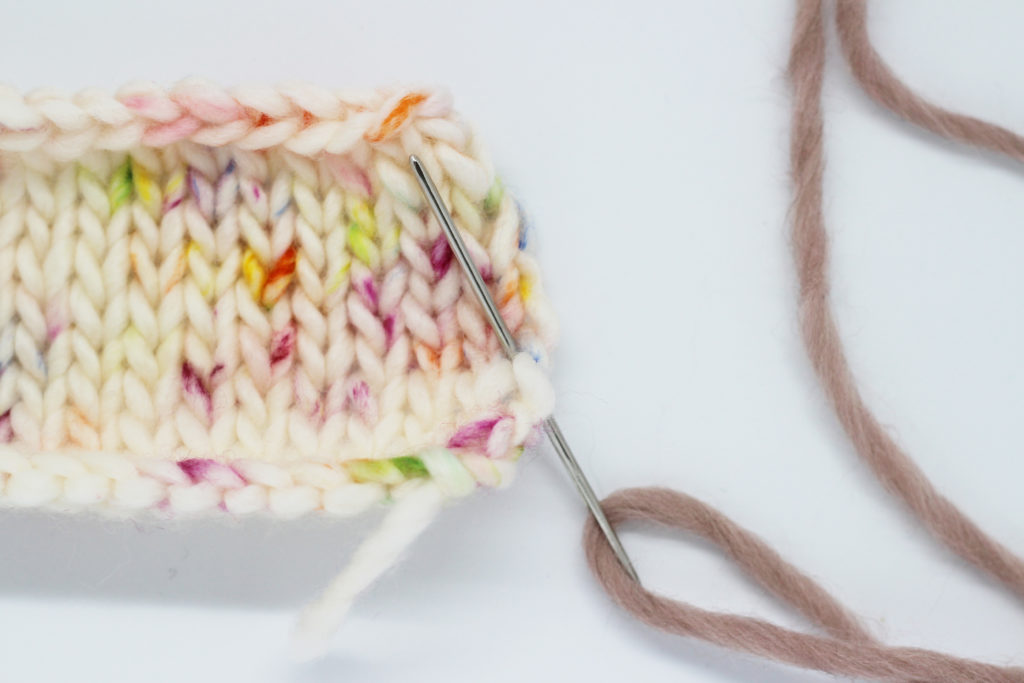
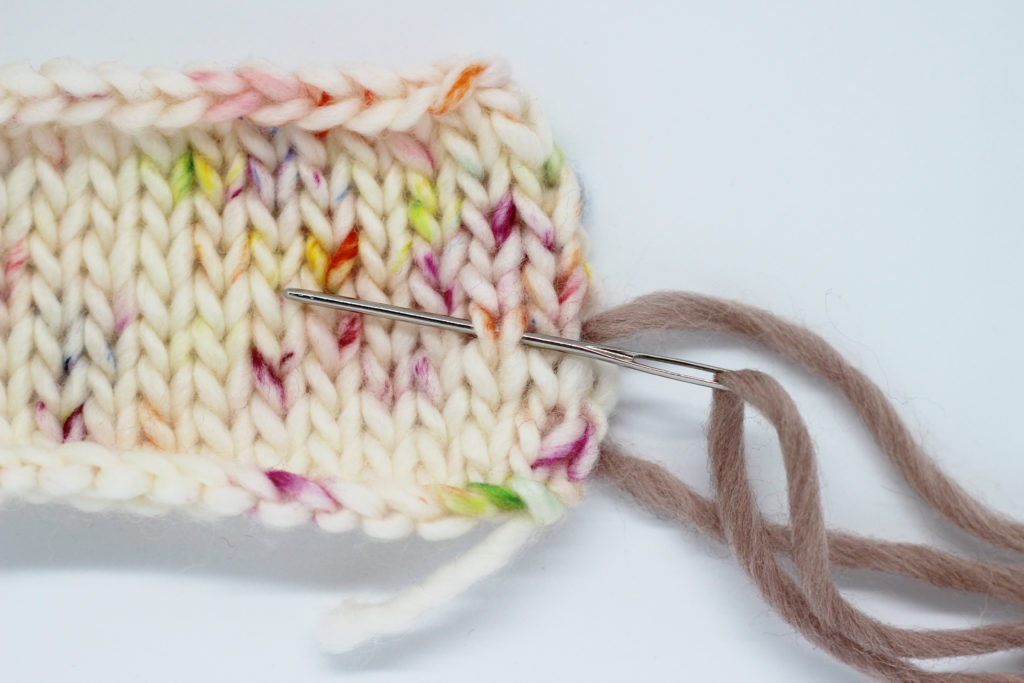
We will start by inserting the needle through the back of the fabric and pull it out to the front, as close as possible to the bottom right edge of our embroidery. Make sure to leave a yarn tail on the back long enough to weave in later so that your work doesn’t unravel. You can also make a few small stitches on the back before bringing your needle to the front.

Using the 3/stitch width that we mentioned above, count 6 rows up, insert the needle into the front and bring it out 2 rows below.
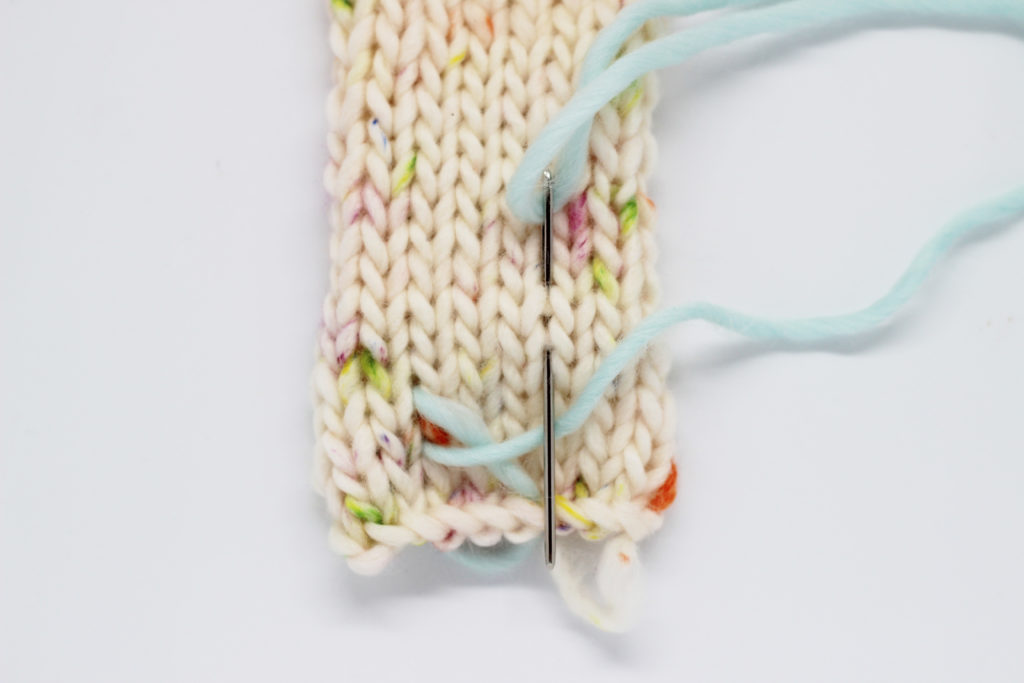
Using the stitch where you pulled out your needle as a reference, count another 6 rows up, insert the needle on the right side (keeping in mind that the horizontal distance should be 3 stitches), and pull it out 2 rows below. When you pull the needle out of the fabric it should be under your working yarn. In the photo you can see the needle on top so that you know where to pull it out.

Keep working by following the last two steps.
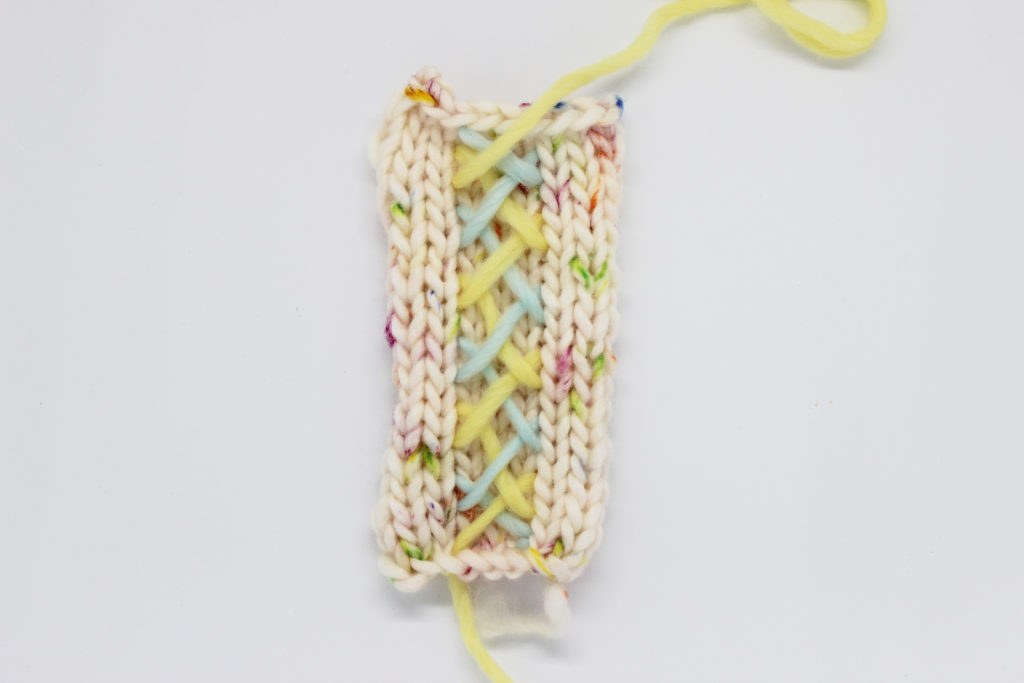
When you get to the last stitch, pull your needle out through the opposite side from the next to last stitch. This way you will keep the stitches crossed.
You are done with the first color; know we have to thread our needle with the second color.
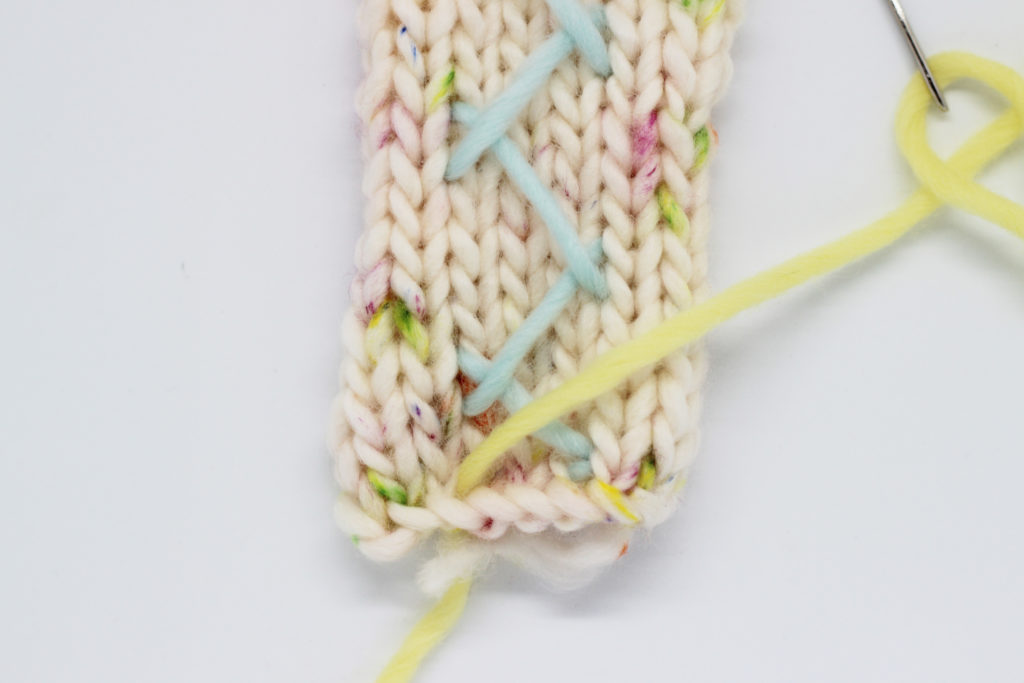
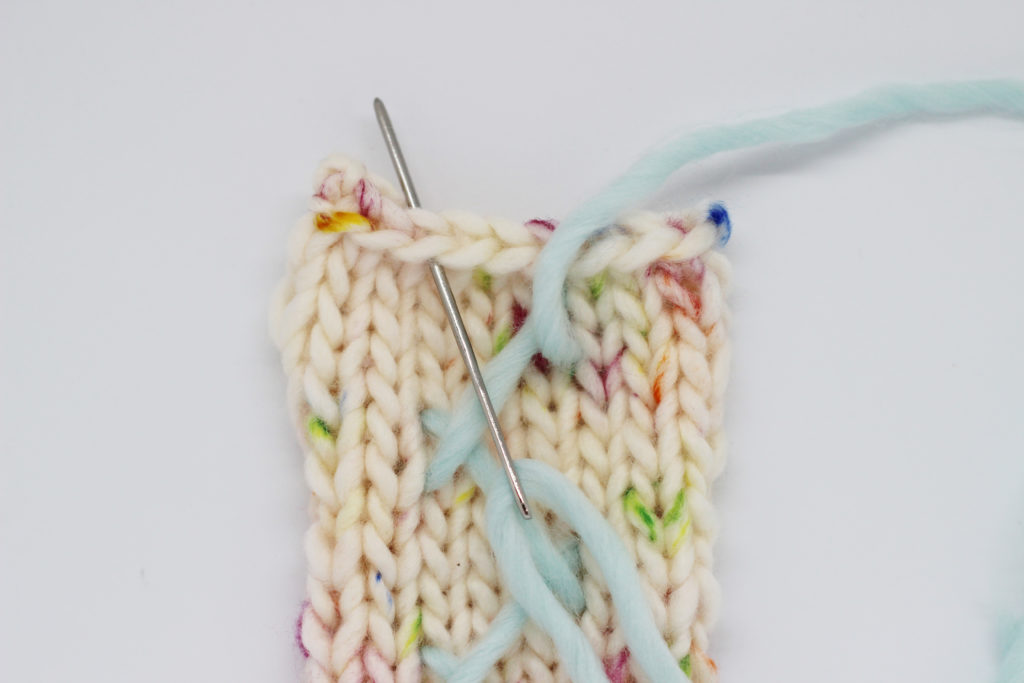
We will insert the second color the same as the first, inserting the needle through the back of the fabric to the front, but this time we will do it on the opposite side. This time it will be on the left to start crossing the two colors.
Bring the needle to the front of your work. We will make our stitches symmetrically, so insert the needle six rows above the stitch you started with, and bring it out two stitches below. As you can see it will be across from where you worked the first color. Since you are carrying the yarn to the right it should be on top of the first color.
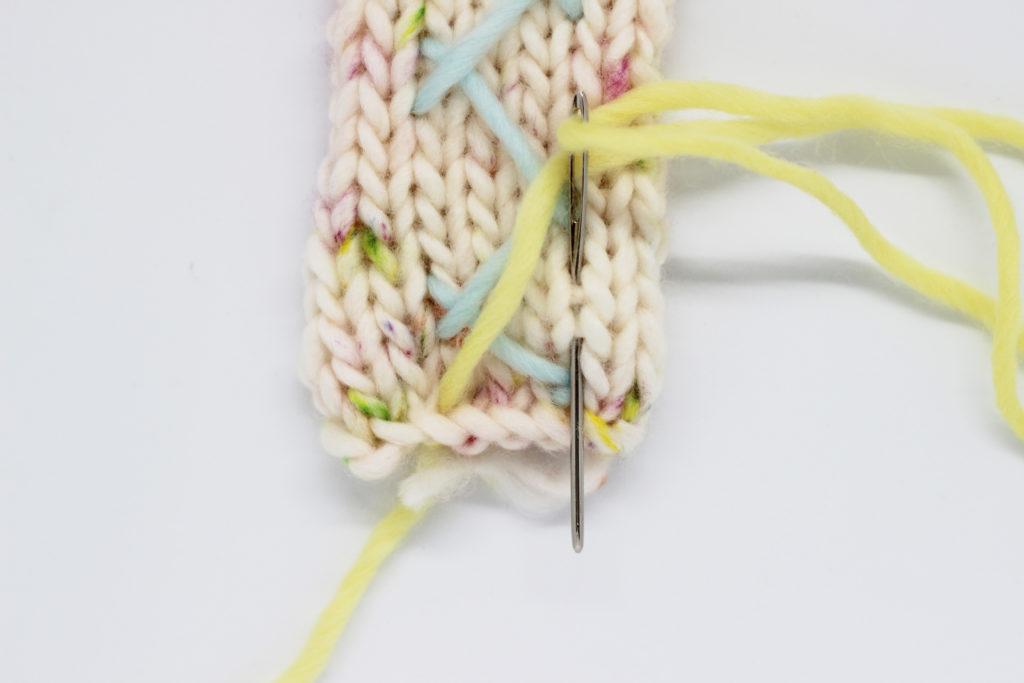
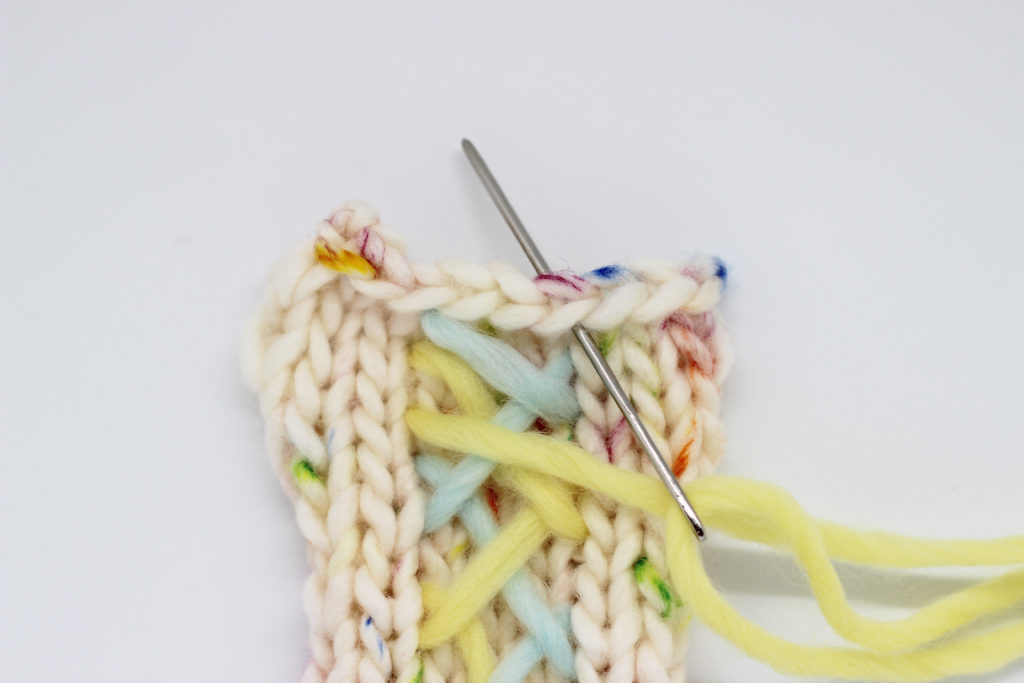
To make the cross to the left: cross the color you are working with under the first color. Insert the needle six stitches up and pull it out two rows below.
Continue working by following the last two steps: remember that when you carry the yarn from left to right it goes over the first color, and when you work from right to left it goes under the first color.
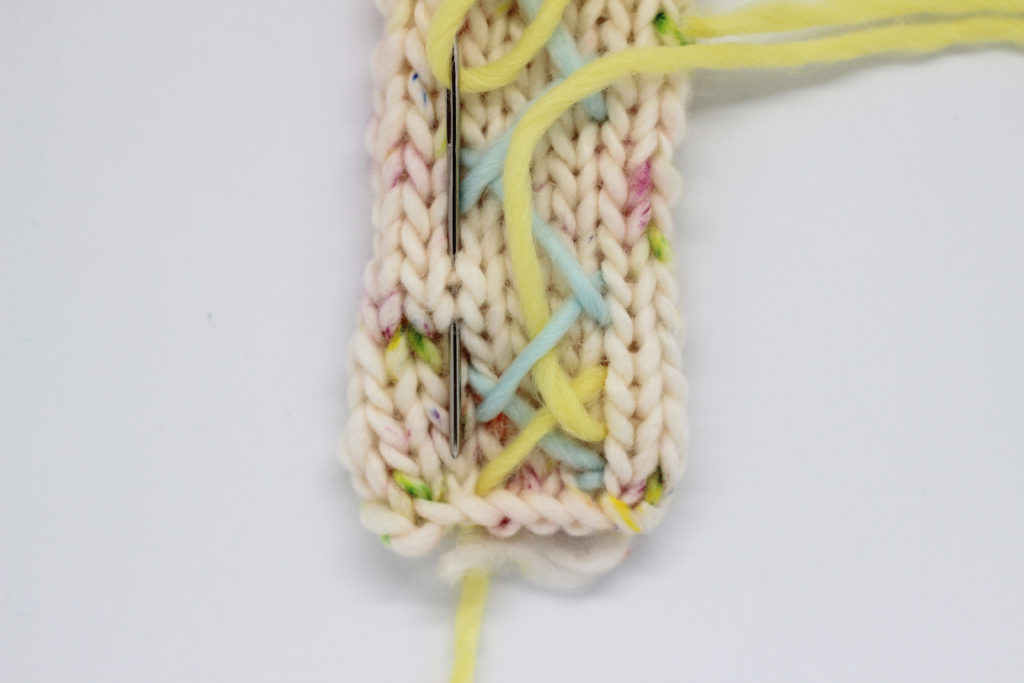
When you get to the last stitch, cross the yarn to the opposite side from where you made the last stitch.
Insert the needle to the back of the fabric again and weave in the end to secure your work.
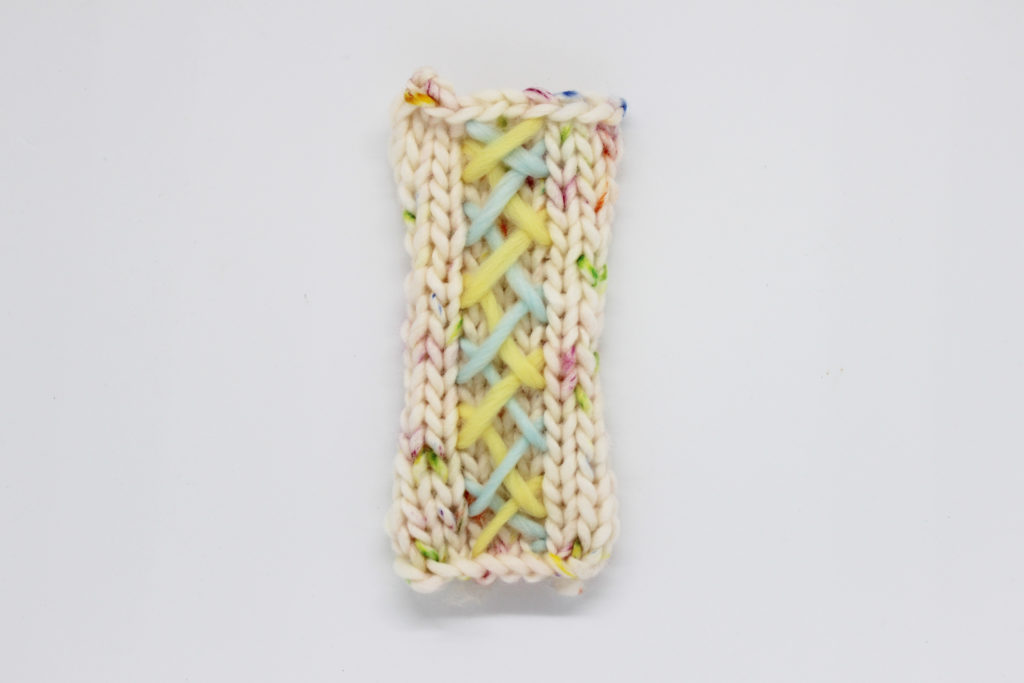
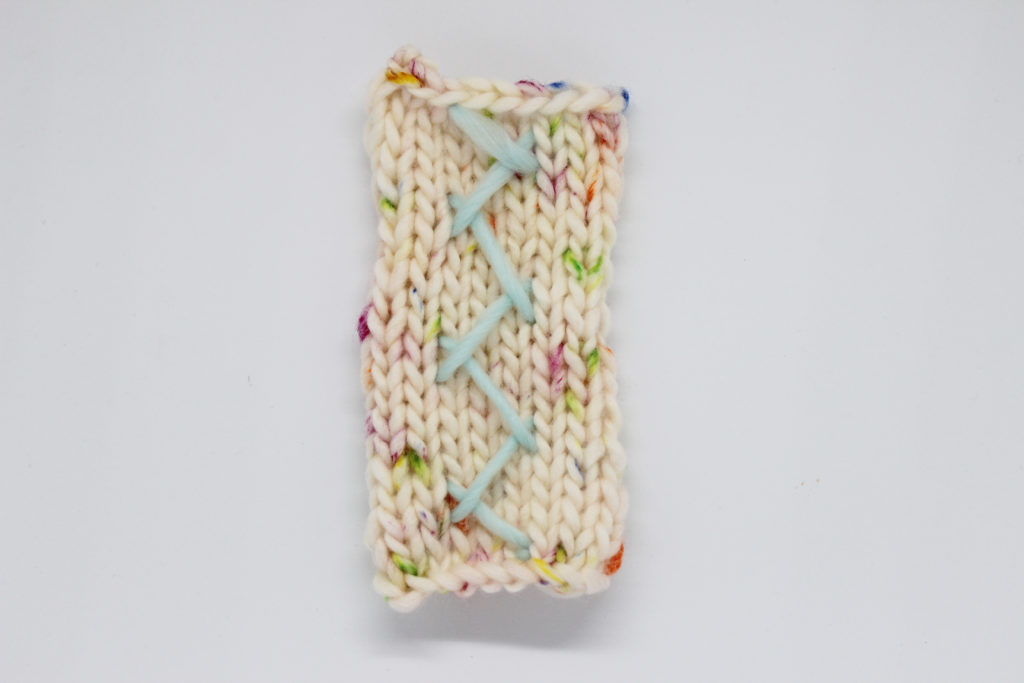
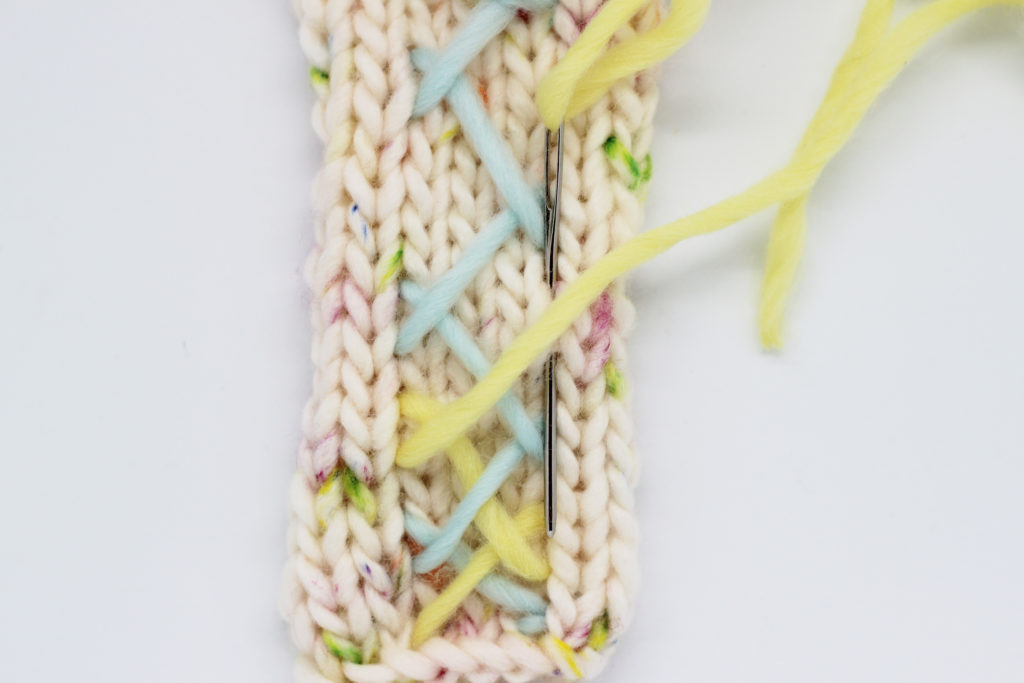
This is how it will look when you are done.
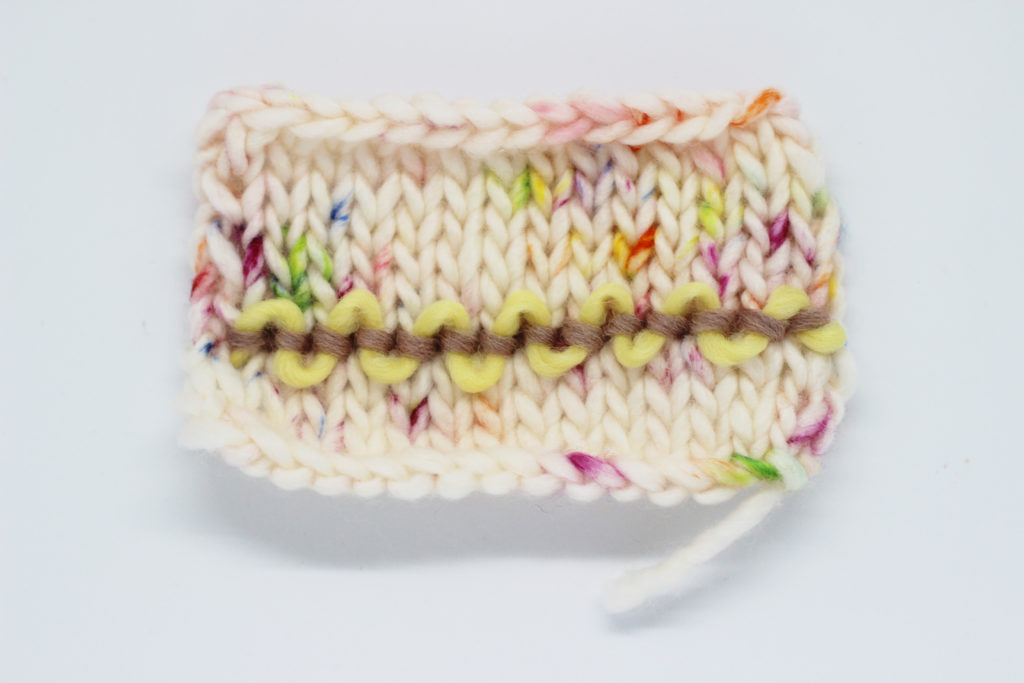
Stitch 2: waves
To embroider this stitch you will need three different colors of yarn. This stitch is worked horizontally so it will look great around the bottoms of your garments or on pocket openings.
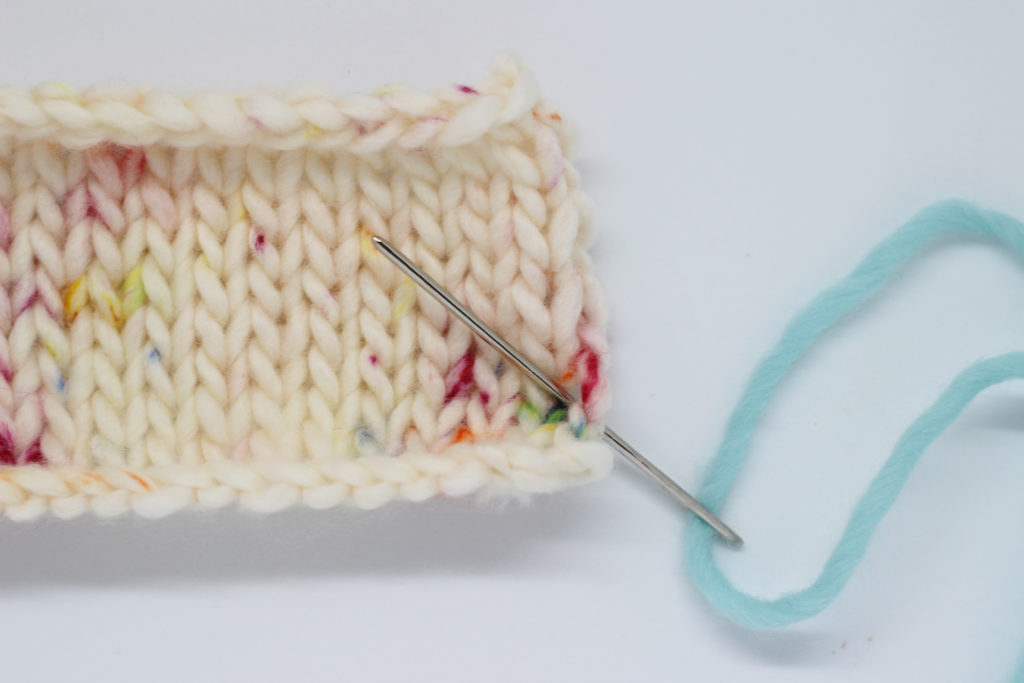
We’ll start by threading our needle with the first color and inserting the needle from the back to the front. Just like for the first stitch, leave a tail of yarn to weave in later, or make a few small stitches on the back before bringing the needle to the front.
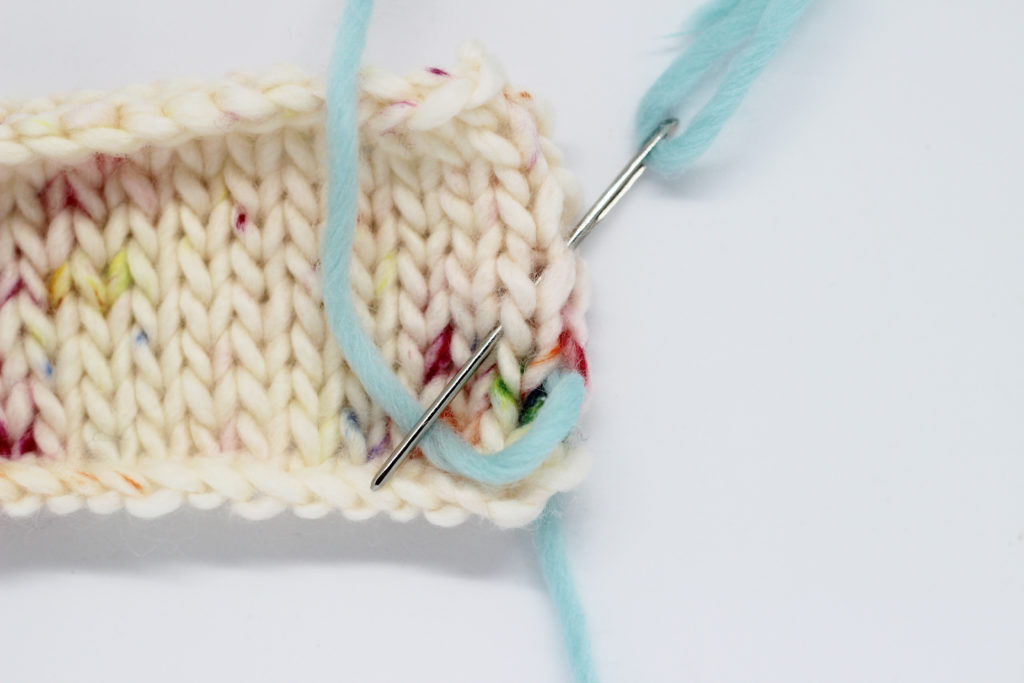
Now we are going to create a straight line, so being careful to work on the same row, insert the needle from right to left skipping a stitch each time.
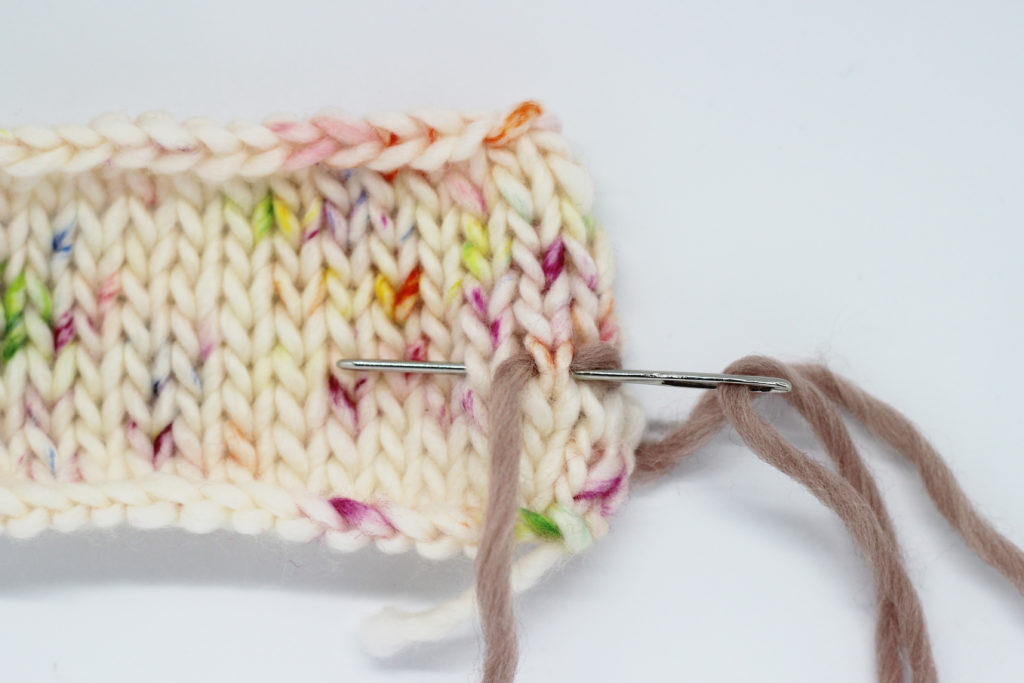
Insert the needle again into the previous stitch, from right to left, and bring it out through the next stitch.
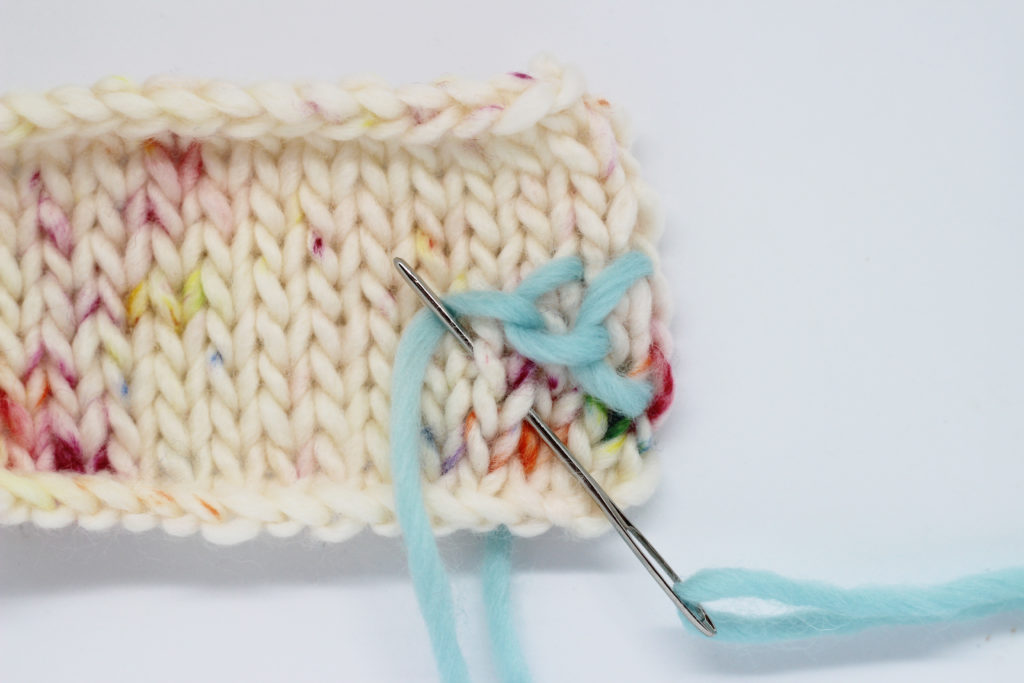
Keep repeating the previous step until you reach the end of where you want to embroider.
When you reach the end, insert the needle to the back and secure the yarn so that your work does not unravel.
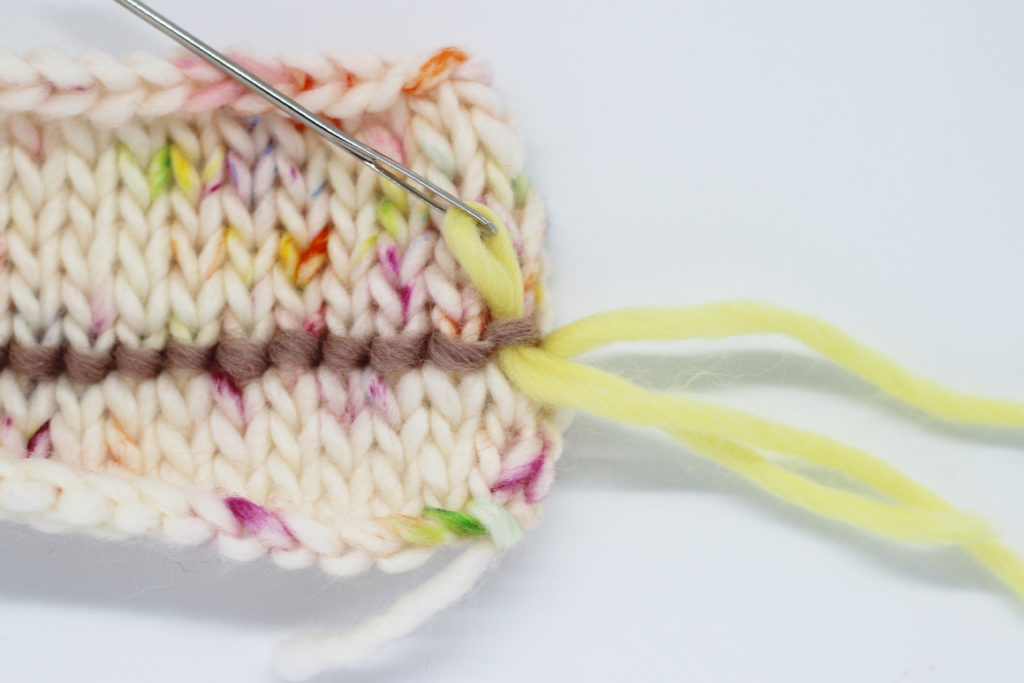
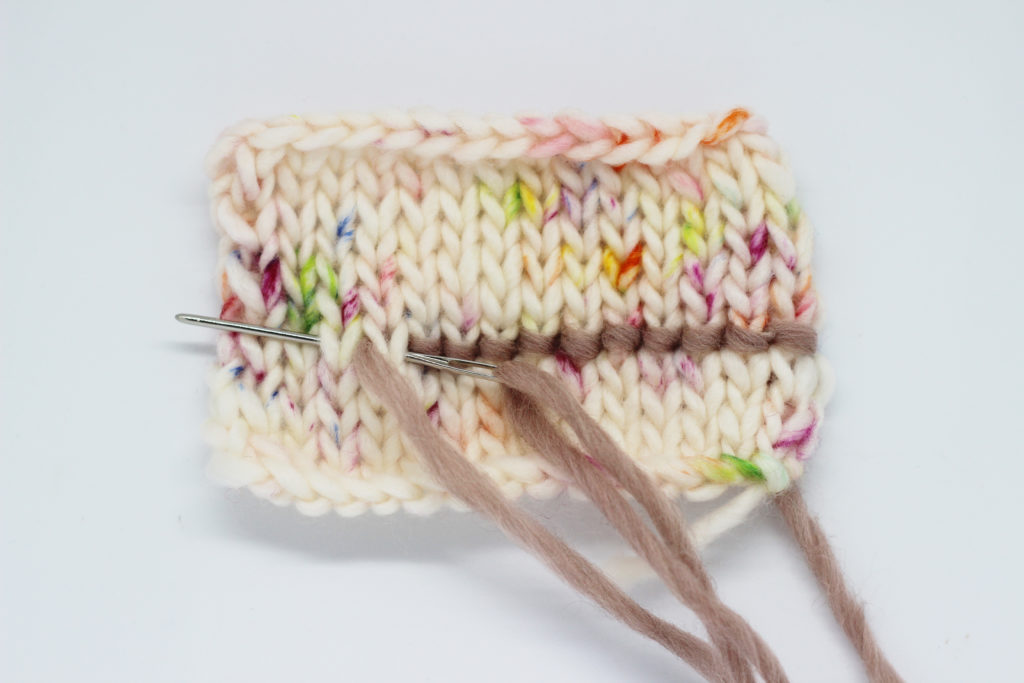
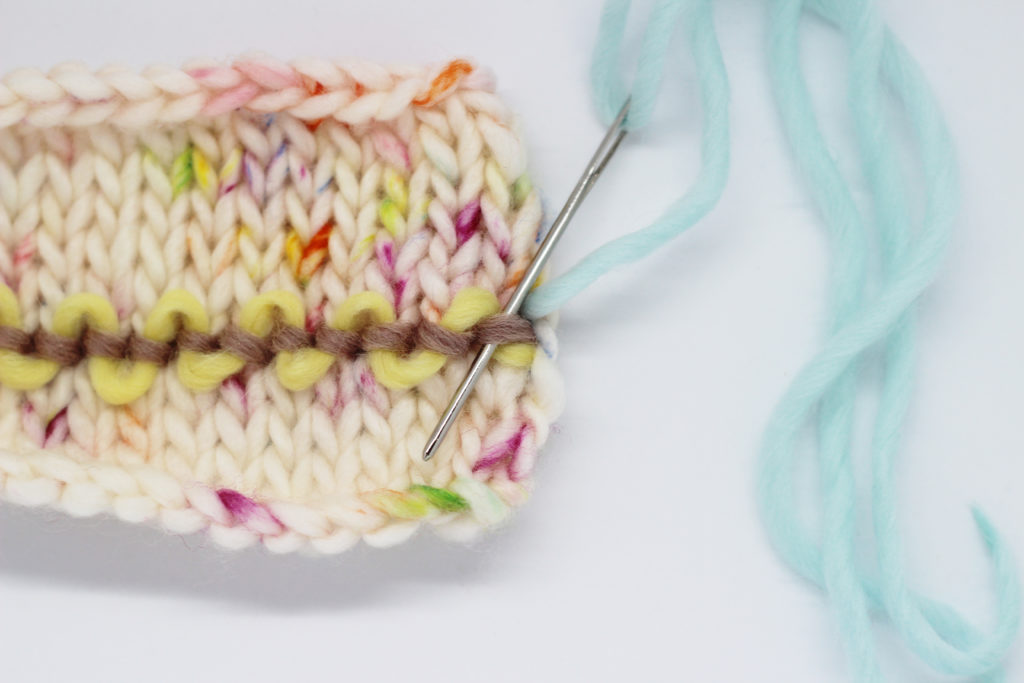
Thread the needle with the next color. Start by inserting the yarn from the bottom to the top underneath the first stitch of the first color.
Continue passing the needle behind the next stitch, but this time from the top to the bottom.
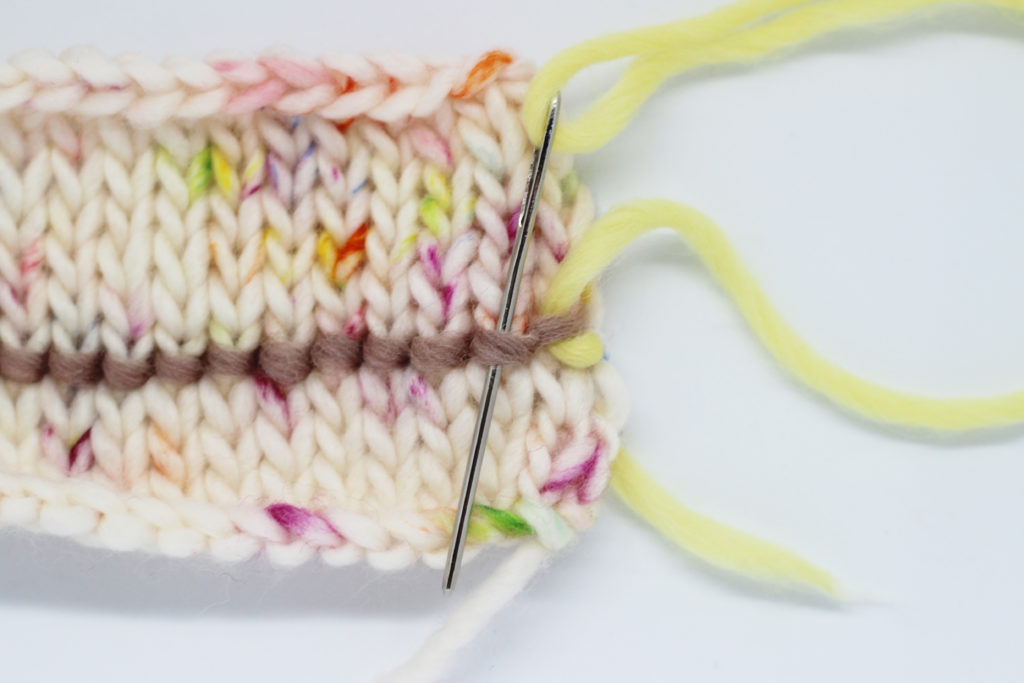
Pass the needle from the bottom to the top again under the next stitch.
Continue working the last two steps until you reach the end of your design. Don’t pull too tightly each time you go under a stitch, it should be loose, if you pull too hard on any of the stitches you can use the tip of your needle to pull the yarn out a bit.
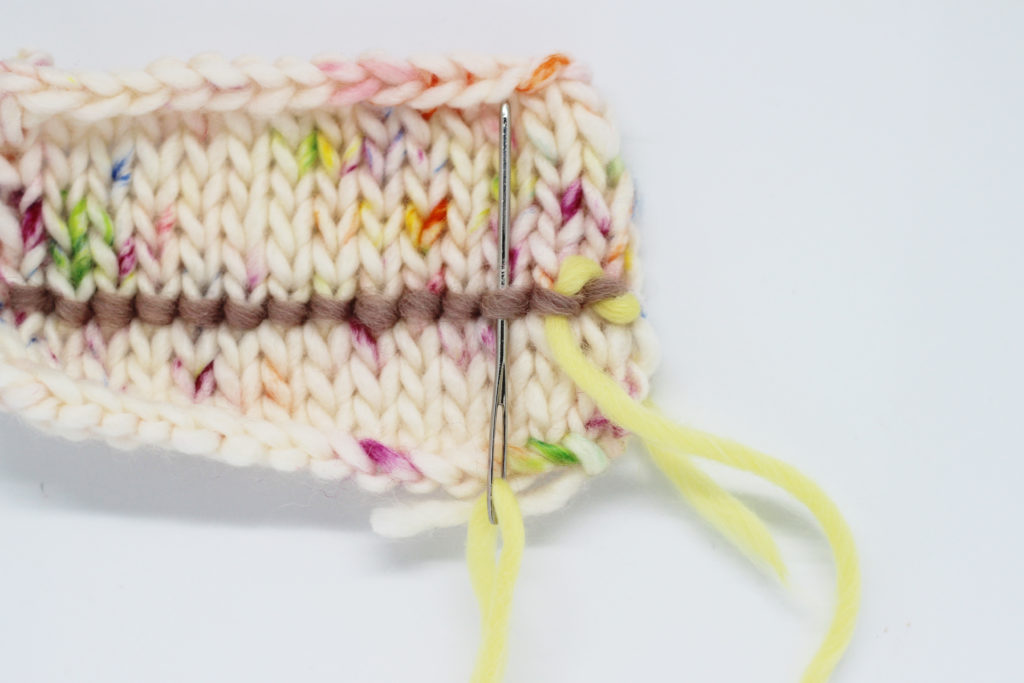
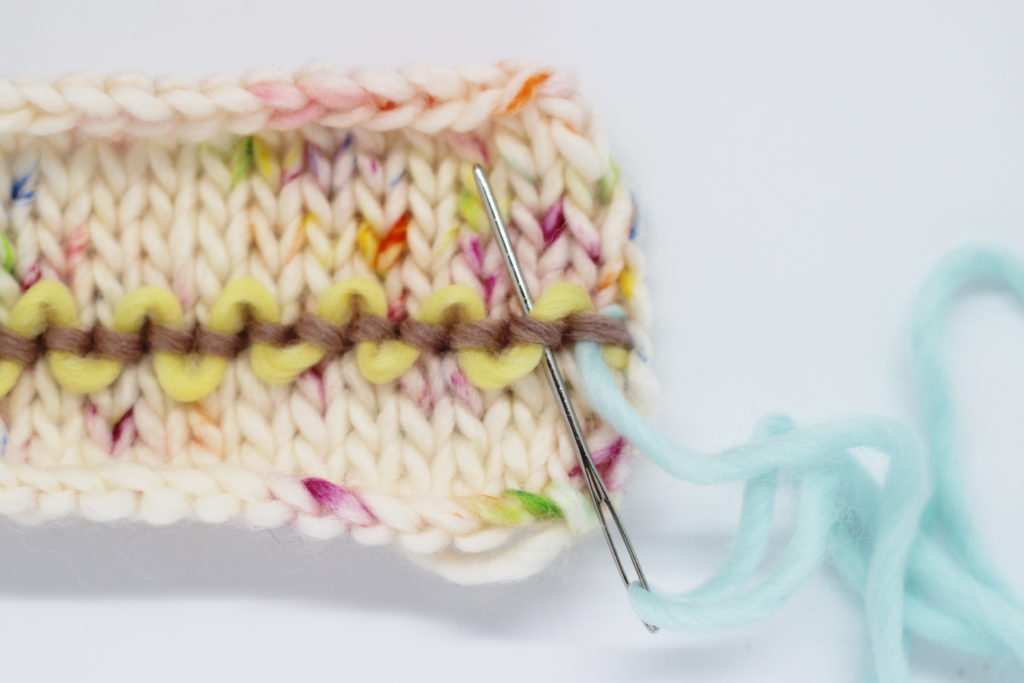
When you reach the end of the row, insert the needle to the back and secure the yarn to weave in later.
Thread the needle with the next color. To start, insert the needle from top to bottom (the opposite of the last color) passing the tip under the last two colors.
Insert the needle from the bottom to the top again.

Repeat again passing the needle from the top to the bottom.
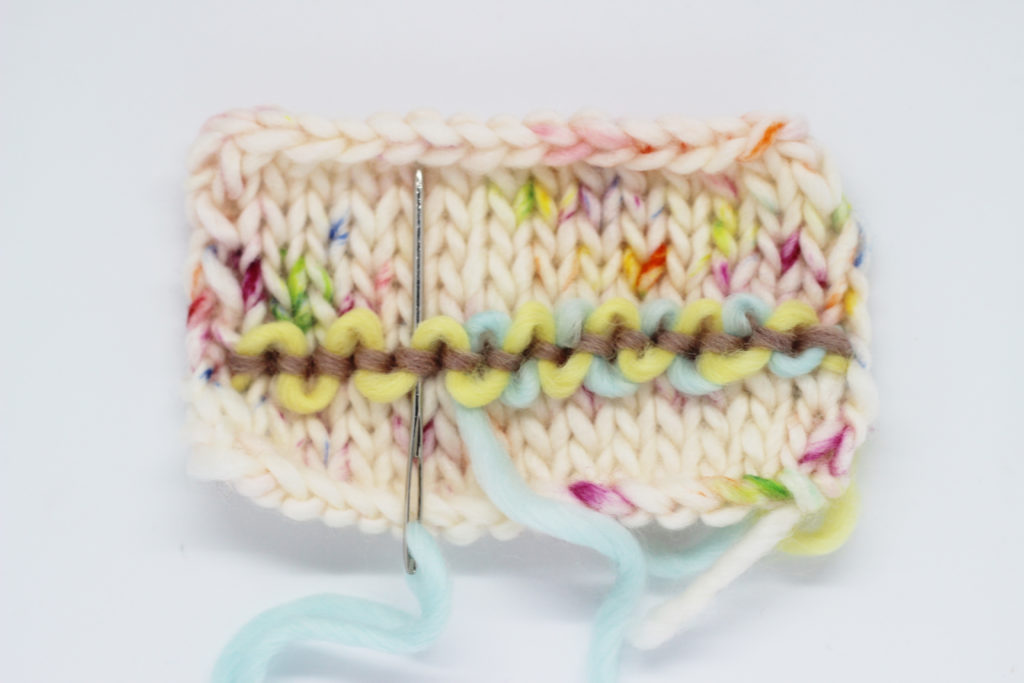
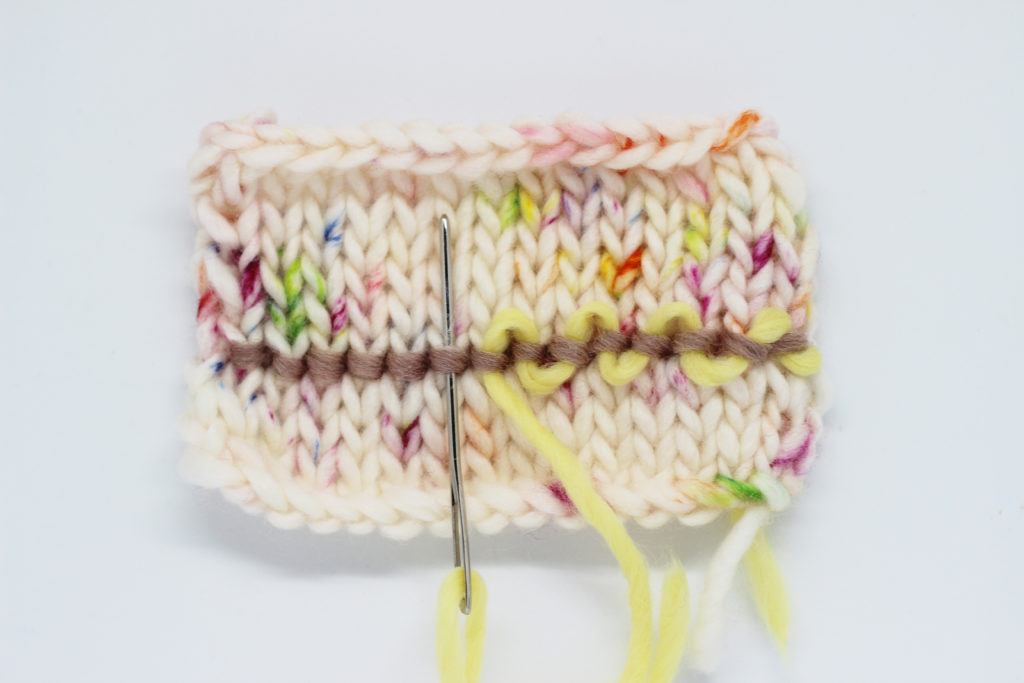
Continue working the last two steps until you reach the end.
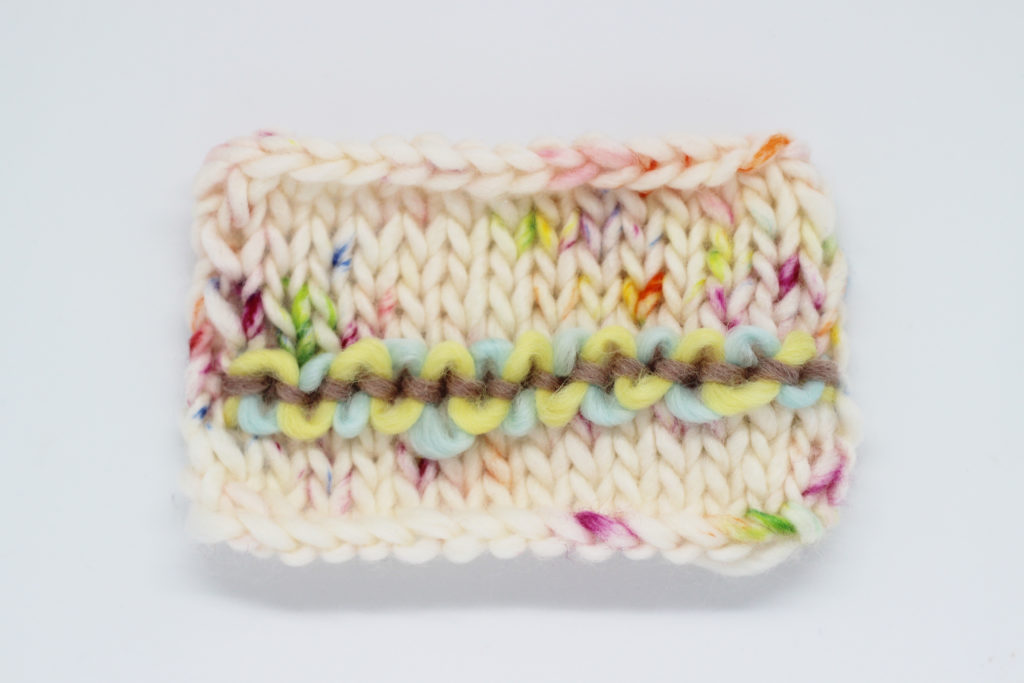
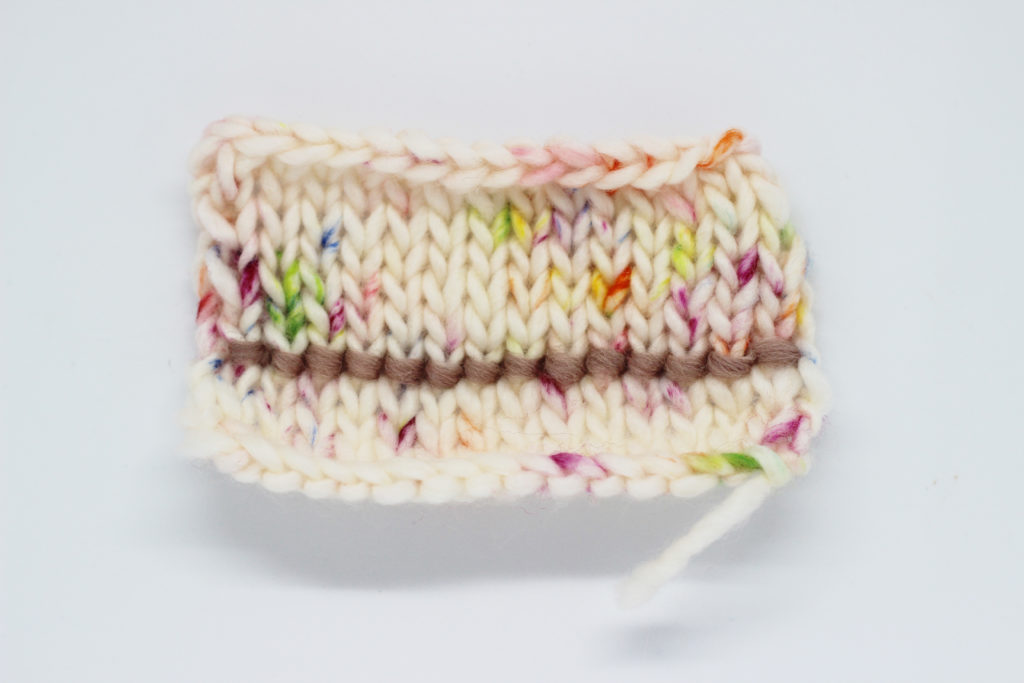
When you reach the end, the same as we did for the last two colors, secure the yarn in the back. Our waves are finished!
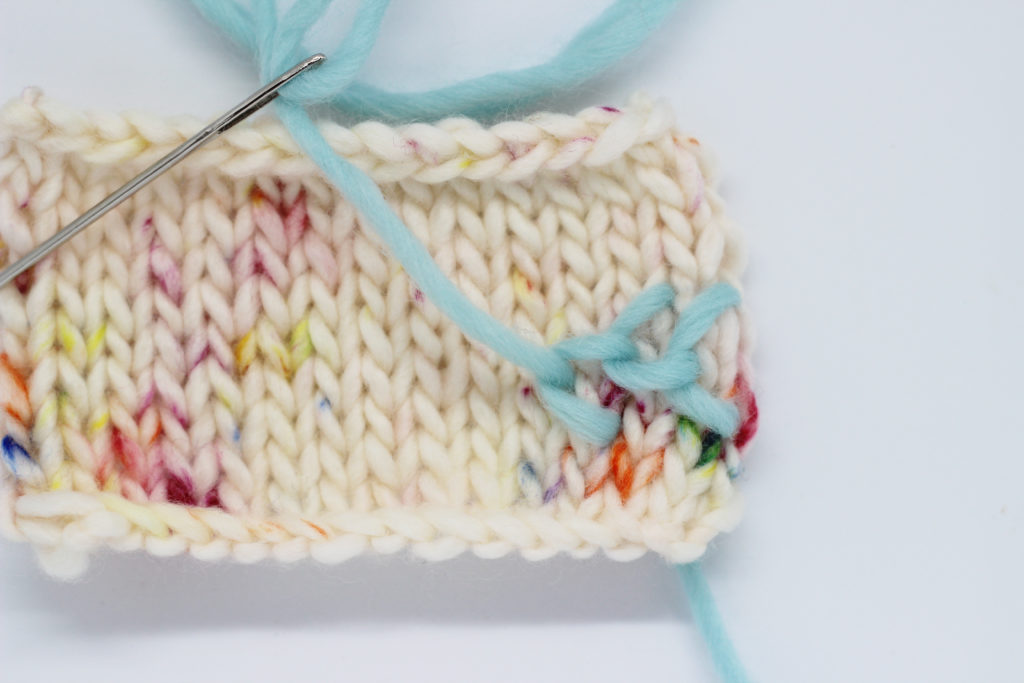
Stitch 3: feather
For this stitch you only need one color. The feather stitch is worked horizontally and will look great on the sleeves of your garments. It will add a lot of personality since it can be worked quite wide.
We start this stitch at the bottom. Insert your needle from the back to the front to start.
Count up 4 rows from where you inserted the needle, insert the needle in this stitch and pull it out on the diagonal on the other side of the stitch, two rows below. The tip of the needle should be on top of the thread. If needed place it on top just as you are pulling the yarn to form the stitch. The 4 rows will be the width of our feather. If you want yours to be wider, just increase the distance, but remember that it has to be an even number so the center is centered.

To make the top stitch, count two rows up from the center, insert the needle there and pull it out on the other side two rows down. Remember to pull it out on top of the other thread, this way the stitch will be secured in place.
To make the bottom stitch of the feather: insert the needle two rows down from bottom to top, and pull it out two rows above on the other side of the stitch, so that it lines up with the center of the design.
As we said before, the working yarn always has to be on top of the stitch. In the image above you can see how it looks once you have completed a top stitch and a bottom stitch.
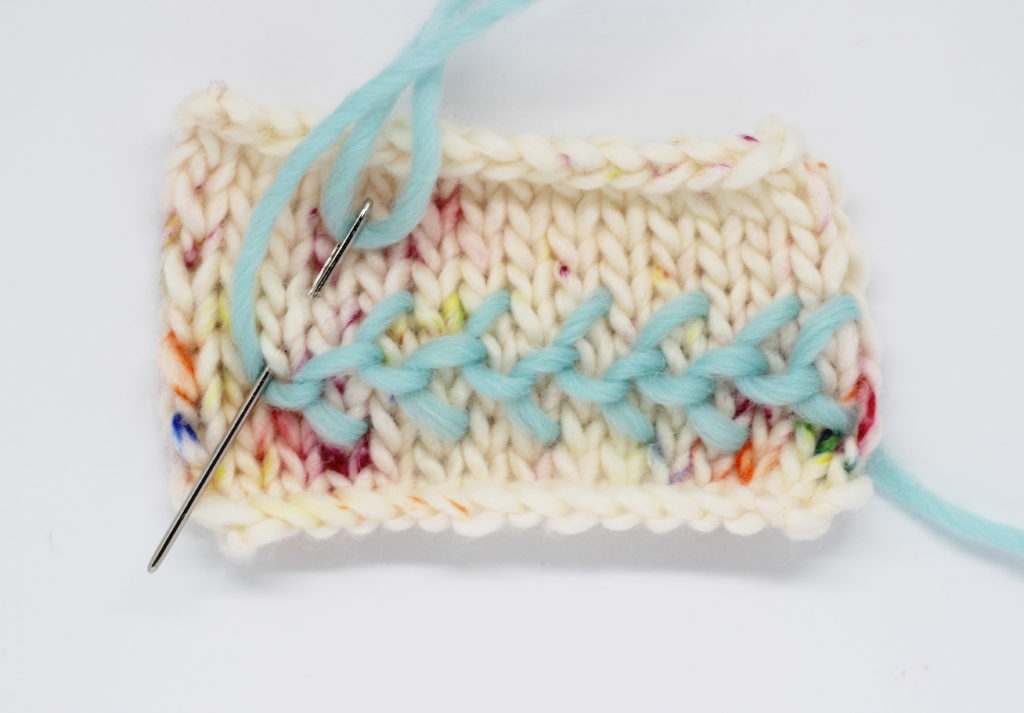
Continue embroidering alternating between upper and lower stitches until you reach the end of your work.
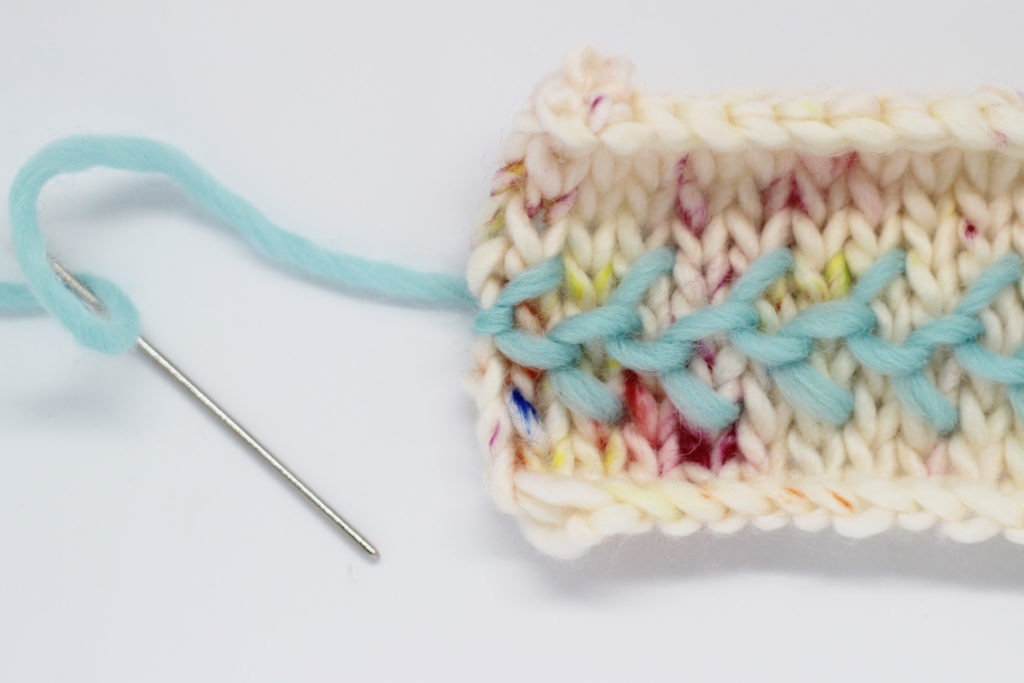
When you get to the last stitch, make a stitch to the back of your work to secure the center of the feather.
Remember to weave in the end on the back of your work so that it doesn’t unravel.
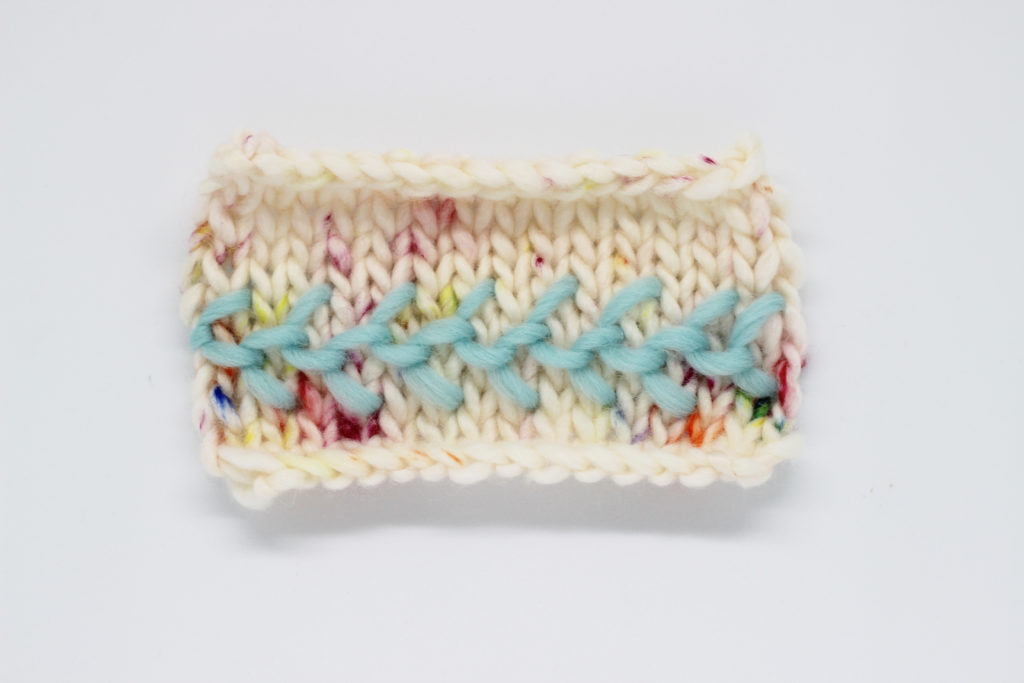
We hope these three embroidery stitches give you some ideas to personalize your garments and give them a different touch. We’d love to see how you use these ideas on your projects by sharing them with us using the hashtag #weareknitters. Until next time, knitters!