In the world of knitting there are a lot of different types of increases and it is really important to know them all so that when we knit we can choose the one that fits best with the project we are working on. Since not all increases are the same, each one of them will look different in the end. In this post we are going to show four different basic increases and how to use them.
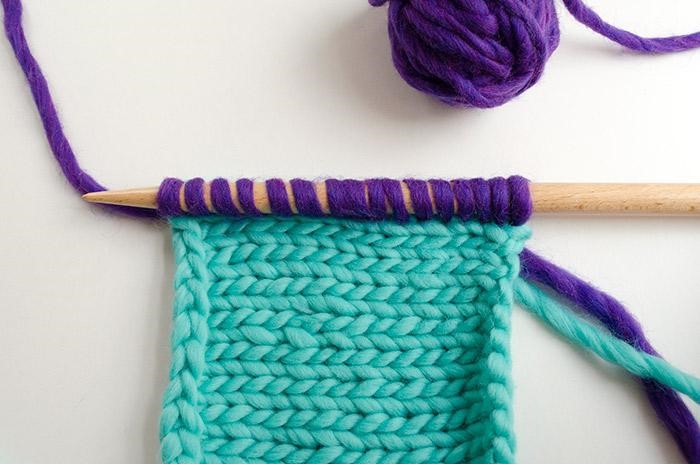
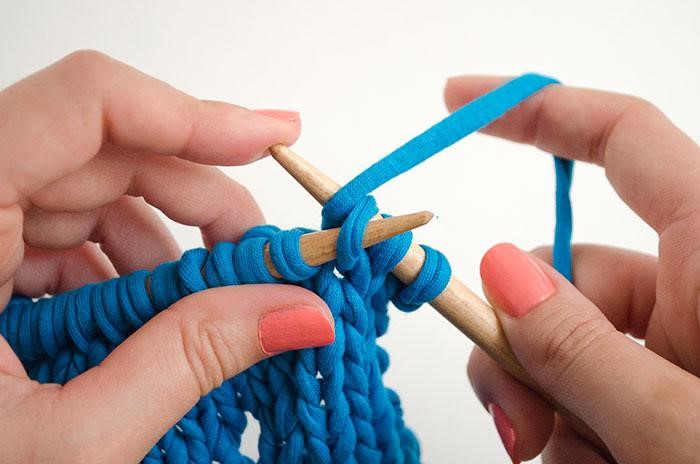
Yarn over
This is without a doubt the easiest increase, because all we have to do is circle the needle with the thread and by doing that we create a new stitch. Then we only have to knit this new stitch in the normal fashion.
This increase has a decorative twist as it creates a little hole in the project (you can also use it to create buttonholes). It is used most of all in eyelet stitch and to create decorative rims.
In this image you can see what it would look like:

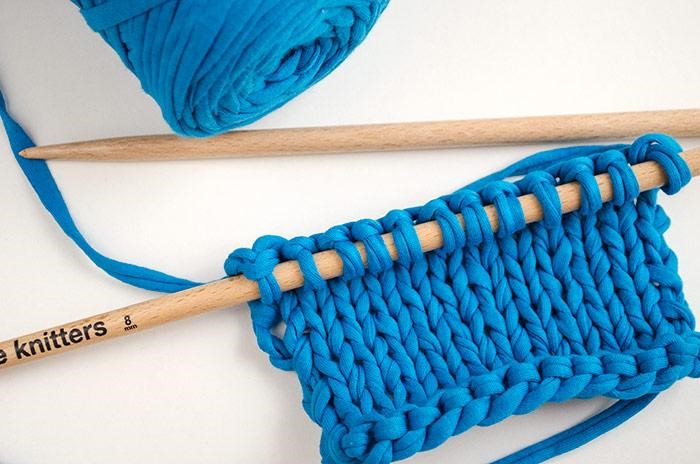
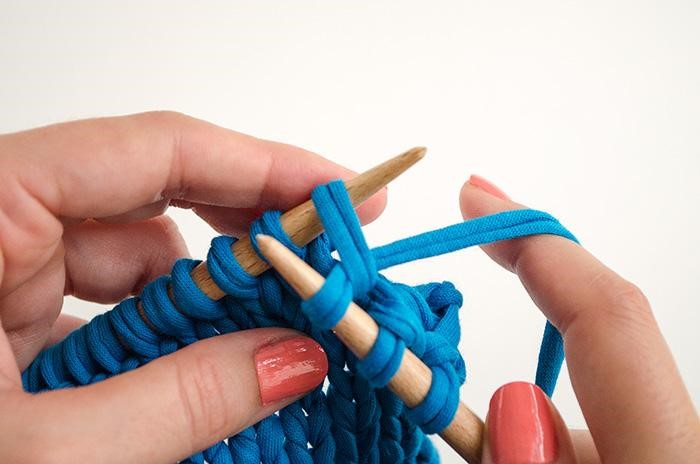
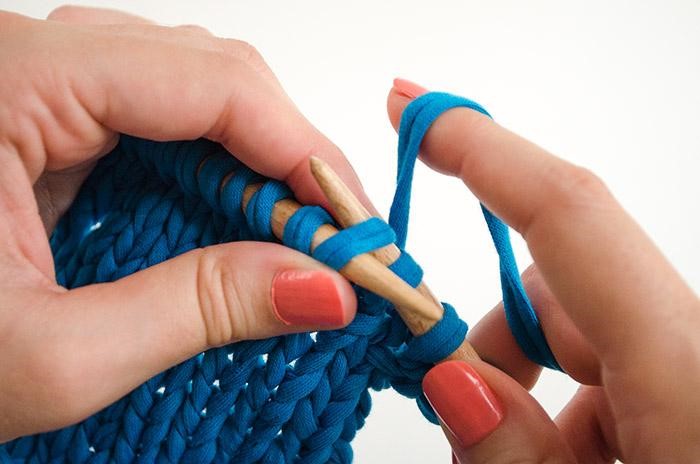
Make one
This increase is also rather easy and adequate for beginners. We form a new stitch with the thread just as we always do when we cast on the stitches at the beginning of a new project. Look at the image above to see how to correctly place the thread.
Making a new stitch is an increase that we can always use when the knitting instructions do not indicate a specific type of increase. The hole that it leaves is practically invisible so that we can use it for knitted and purled increases all the same.
Here’s what it would look like:

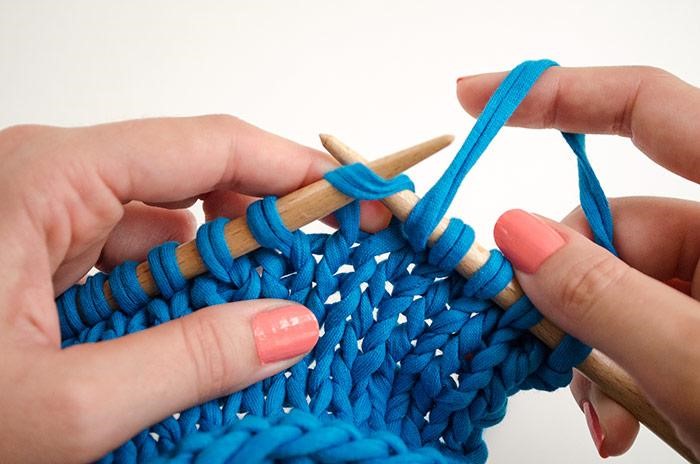
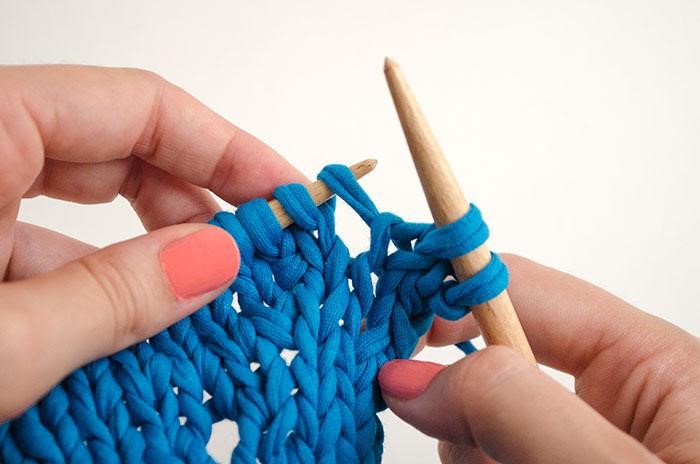
Knit into the front and back
We begin by knitting the stitch that we want to increase in the normal fashion but we don’t let it slip off the left-hand needle.
Now without letting it slip off the left-hand needle we knit it again but this time through the back-loop. Now we let the stitch slip off the needle.
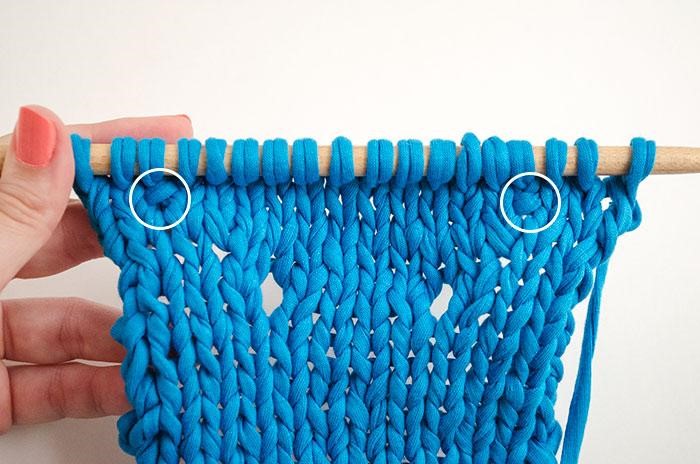
This way we will have increased a stitch and it will look like the image above.
This increase is easy to do once we have a little practice and it is also rather discreet in the final project, although as you can see there is a little horizontal thread visible after making the increase:

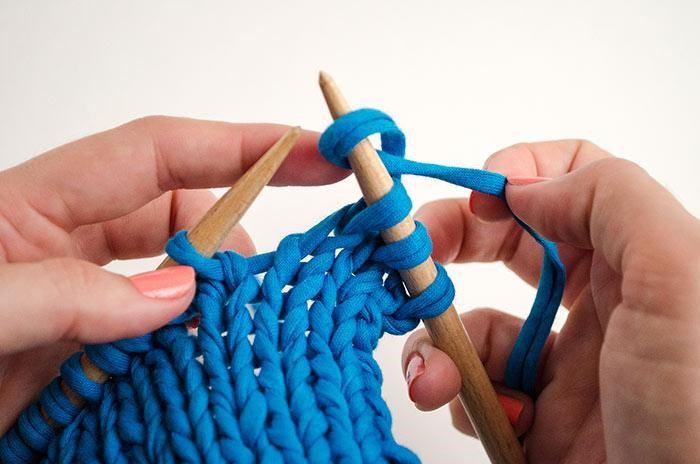
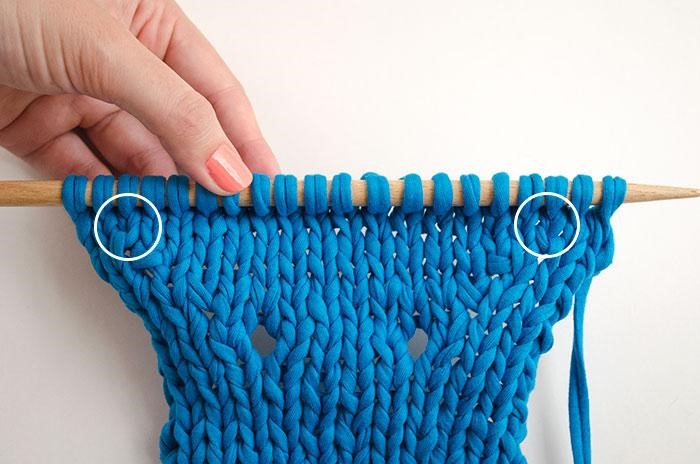
Make 1 right / Make 1 left

We lift the horizontal thread between two stitches and introduce the left-hand needle from the front to the back.
We knit this stitch through the back-loop.
This way we make an increase that is slightly inclined to the right. Knowing this, it is much easier to make perfect increases in projects that demand symmetry (for example when knitting sweaters).
To make the same increases inclined to the left, lift the horizontal thread, introducing the needle from the back to the front and knit it through the front-loop.
This is how this increase would look in a sample, as you can see it is also practically invisible if we always adjust its inclination to the stitch we increase:
And that’s it! As you can see there are a lot of options when you want to increase a stitch. Choose the adequate one for your project and you will see how it pays off in the end.
Here we have used 15MM wooden needles and the fabric yarn in intense blue. Choose your favorite color and don’t forget to share your results with us on Instagram using the hashtag #weareknitters!